Marble Run Wall at reDiscover Center

Now that summer Tinkering Camp has wound down, I can share some of what we’ve been up to! I will post about the camp experience in itself soon, but first I’d like to show you one of the newest additions to reDiscover Center. Take a gander at the marble run wall!


DSC03747


I worked with Molly Allis to build an 8-foot-tall pegboard wall for one corner of the studio. The top 40% contains elements designed by myself and some other facilitators and kids, which are meant to stay in place for the most part. There is a spiraling cylinder pulled from a donated gum ball machine, and a pachinko machine that uses screws as pegs. Pulley systems are set up on both sides of the pegboard to allow kids to crank marbles to the top of the marble run and let them loose.


The rest of the pegboard is entirely for tinkering. Kids can make elements such as ramps and funnels to add and move around, using wood, power tools, and recycled materials. Every day includes playing with the marble run wall!


Take a look at the videos below showing the process of making this installation and some of the first elements.


Woodcraft and Tinkering School Teaser

 I’ve been spending a lot of time in the workshop lately, creating more of my wooden ragbots and wooden jewelry for my upcoming Etsy shop. 


IMG 6767new wooden ragbotlayered ring


We’ve been quite busy with the launch of reDiscover Center’s new Tinkering Club program – tinkering every day of the week!  Expect a recap of summer Tinkering School at reDiscover Center soon, with oh so many pictures. To whet your appetite, here’s a video from one of the light and shadow plays a group of campers created (they wrote it, made the stage/screen, designed all of the puppets, and did the lighting).


Spring Break Tinkering School, Part 2


rDC Spring Tinkering Camp

Spring Break Tinkering School at reDiscover Center finished about a month ago now, and was great fun, and finally I have the chance to show you more pictures and video from the week! Check out my Flickr album here. The kids got a basic understanding of many of the things that go into creating a movie while building and playing with their creations. Thursday morning, we finished up our sets, props, and costumes, and in the afternoon we had some rehearsals, followed by quick filming. As it turned out, our main character was one of the script writers, and he had his lines memorized pretty much from the get go.


There were a few places where the counselors needed to supervise more closely than we might have ordinarily, given more time, so that we could get a video that effectively captured their creations. Several campers took turns operating the camera dolly with a counselor always on hand to keep an eye on the camera angle and record button, and one in particular took a keen interest in the audio recording, spending a lot of Thursday roaming camp with a recorder mounted on a camera tripod acting as a boom and headphones so she could hear what the microphone heard.


Thursday night, I edited our footage, a panoply of experimentation, improvisation, and sometimes intentional bloopers. (If I’d had more time, I would have created a blooper reel as well)


First thing Friday, after our welcome activity, the campers had the opportunity to see their movie, Attack of the Marshmallow Maniac, which clocked in at a whopping six minutes. Click below to watch it!


One of the things that most impressed me was that, once we hit our stride on Friday, creating elements of our theater/arcade for the parents’ screening, the campers had reached a point where they were comfortable enough with the tools that they could focus almost entirely on their creations. It is such a satisfying experience to see your campers truly absorb the medium.


There are many exciting plans in the works for Summer Tinkering School (one-week sessions starting June 15th – some spots are still available), but I won’t list them here in case any future campers are reading. It’s a surprise! You’ll love it!

Spring Break Tinkering School at reDiscover Center

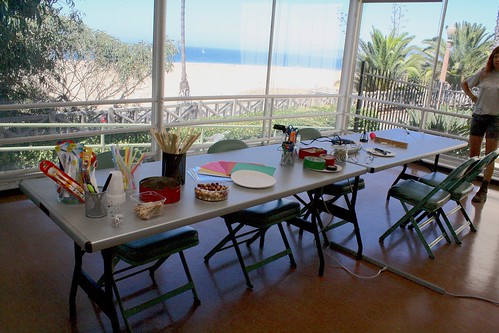
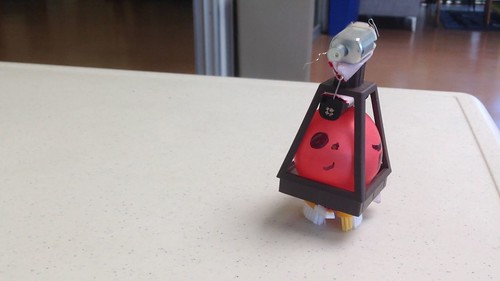
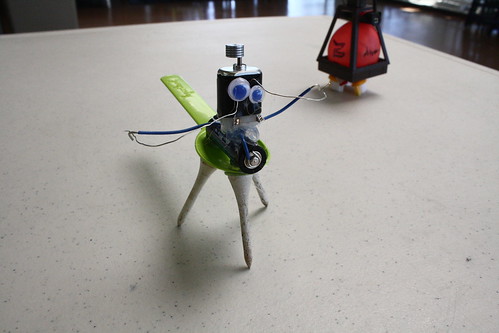
We are making a movie this week at reDiscover’s Tinkering School, where I am lead instructor. And when I say “we are making,” I mean the kids. They will be designing and building absolutely everything – the script, the sets and props, the camera dolly, and all of the characters/creatures. Today, the campers (aged 7-12) were presented with the week’s big build theme: Monster Attack Movie, and – after much debate and voting – they decided on a Lightning Marshmallow Man for their monster. 


Photo Mar 24 12 46 23 PM


(The creativity behind this kind of brainstorm list just makes my day.)


It’s interesting to contemplate the things that the kids considered monster-worthy, especially as each society’s monsters are a reflection of the threats and concerns of the time period. There is obviously a heavy element of whimsy (a mutant transforming kitten, for example), and a lot of animals or everyday things turned upside down (a zombie vulnerable only to enchiladas), but the story that developed from their chosen monster says a lot. The marshmallow man comes about when a barrel of toxic waste spills on a bag of marshmallows. An environmental hazard makes the fluffiest of sweets deadly, and brings on natural disasters in the form of targeted lightning strikes. It does say a lot about what children see as some of the biggest threats right now.


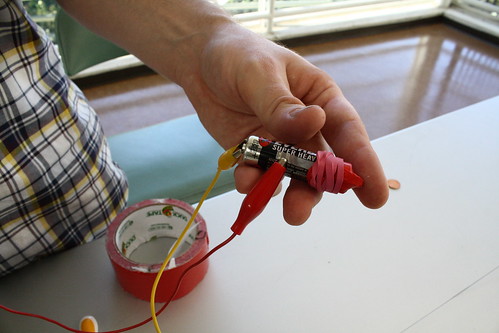
Yesterday, they had training in all of the main tools of our shop: clamps (regular and corner), power drills and drivers, squares and T-squares, tape measures, hand saws, saw horses, jig saws, and the chop saw (the last two always are used with direct adult supervision).


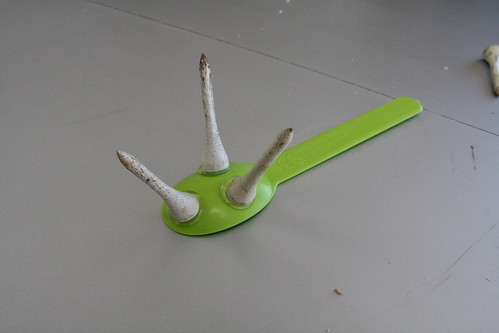
The Tinkering Challenges from yesterday were to build a structure from dowels and corks with a trick that can easily knock it over, and – in the afternoon – to build something to move a cup of water around the room without  spilling it or holding it with their hands. We wrote down what we discovered from those challenges, and today we got to use those observations in planning the set destruction and the camera dolly.


They absolutely dove into building once we got going. The groups (which I always like to assign after the brainstorm, and based on what sparks their interest) had a few prompt questions to help them think of what aspects they would need to plan for. Fortunately, I had my laptop with me, because our writers have some killer keyboard skills and had enough ideas to need that speed. The monster building group decided on their materials, started building the frame, and learned how to use spade drill bits when they wanted larger holes. The set/props group began construction on a toxic waste refinery, the empire state building, and marshmallow bombs that break apart when they hit the ground (a really effective design, where foam balls are cut in half and held together loosely with a cork in the middle). The camera group assessed the challenge results from before and created their own design for a dolly based on them, which includes spaces for prop storage and snacks. Gotta love crafty. :)


I’m really looking forward to tomorrow, and will post again with pictures!

State of the Makin

I’ve done a lot of instructables lately. Last week was the end of their Makerspace competition, which had a lot of fabulous entries, and our very own CRASHspace won with my Hexachord instructable. Woohoo! My Light-up Hobbit Papercut Bookmark also won second prize in the papercraft contest.


Which is not to say that I haven’t been creating physical things as well. The CNC router is just too much fun to leave alone, and I’ve made a couple wood signs, including this in-progress one of one of my favorite quotes from Steal Like an Artist. More pictures when it’s done.


B88TpqvIQAAvTas IMG 6262


We’ve also been using a lot of T-Glase filament in the Bukito 3D printer, which is transparent(ish) and awesome for things like hanging air plant terrariums. Here’s the STL of the terrarium I designed in the picture above (where the clear filament looks more like silver). Oh, how I’d love to play with a resin printer.


This spring break and summer, I’ll be running the reDiscover Center’s Tinkering Camps, for which we have all kinds of fun plans, and starting this coming Saturday, February 7th, I’ll be doing Tinkering Studio afternoons as well. I am super excited about these upcoming events!

Tinkering and Prototyping Materials

Tinkering is an activity, a skill, a way of life. It has so much value when it’s open-ended. A big part of its value for adults is that it requires letting go of the “I’m not creative, I need discrete instructions” mindset. Something for adults to consider is that children can do it, and they don’t have the slightest doubt that they can. Adults, you were once children, it was once your job to tinker. You’ve only forgotten that you can.


Hmm, I wonder what this does.


Tinkering can also be a more intentional process. That’s where prototyping lives, between making and tinkering.


skewer marble run   


I have a standard toolkit for tinkering. It’s the set of materials I pull out when I want to tinker with an idea or do a super quick prototype for a specific project. It’s also the basic set I bring along to tinkering classes and events with kids.  Other folks (particularly those in specialized fields) might use different items, some might use more expensive things.  When I’m playing, I like to not have to worry about the cost or availability of my materials. It’s okay if I break something, or waste a bunch in a “failed” attempt (though, there is no failure in tinkering, there are only learning experiences), because I can grab some more and try again. So most of the things you’ll find in my ever-expanding tinkering toolbox are inexpensive and/or available in bulk.


I should point out that this particular toolkit doesn’t include electronics, or recycled materials. Those are lists for another day.


Consumables

  • Bamboo Skewers
    • So useful. So so useful. With a pair of snips and a hot glue gun, you can make more shapes than you can shake a stick at. (bad pun intended)
  • Cardboard
    • Cheap/free and somewhat flexible. Some might complain about it not being super solid, but take a material for what it is. There are times and places for sturdy cardboard. Depending on how it’s constructed, you can find cardboard that will hold a shape fairly well, but it can also be especially useful for its flexibility.  A piece of moderately flexible cardboard folded up can make a decent approximation of a spring.
  • Hot Glue
    • I’ll list a hot glue gun under tools, but the hot glue itself can be a material. It’s great for making quick little shapes, it diffuses light from LEDs nicely, and pressing a motor shaft into a piece of a glue stick is an easy way to attach a light load to a motor should you not have the exact shaft collar on hand.
  • Duct/Paper/Gaff Tape
    • Same deal as hot glue. It can be a material and not just a method of attachment. Doubled over duct tape makes a good tab. If you’re slick about it, you can fashion a functioning belt from gaffer tape (as introduced to me by the fabulous Carlyn Maw). 
  • Shrink Plastic
    • You can get a piece of hard material and cut it with power tools until you get the shape you want, or you can take shrink plastic, cut it with normal scissors, and toss it in the oven to get a quick, hard piece of plastic in whatever shape you like. It’s not 100 percent precise (some plastics works more consistently than others), but this is tinkering/prototyping. It’s not meant to be.  Shrink plastic will get you close enough for a lot of tinkering and rough prototyping.
  • Rubber Bands
    • These are a good stand-in for springs or any tightened cord. Also can be quite handy when you want a soft connection that has a little give.
  • Straws
    • Both thin and fat (boba) straws. Among other purposes, thin straws can help create axles for hinges and wheels, and fat ones are good for self-straightening bendy joints. 
  • Zip Ties
    • Another attacher/material. They provide a good resistant but bendy connection.
  • String
    • Yup.
  • Paper
    • Multiple colors. Cardstock is particularly useful.
  • Random Doodads
    • Little (or big) shapes of metal/wood/plastic/what-have-you that don’t have a related purpose. It’s exciting to bring items that you have no ideas for whatsoever to an event (especially one with kids), because they will think of a use for them that will surprise you. Working with kids is always surprising.


Tools

  • Good Scissors
    • Trying to cut things with crummy scissors is a pain and a half.  You might also consider having separate pairs for coarse vs fine materials, the same way every sewing aficionado has dedicated fabric scissors that ARE NOT used for anything else.
  • Wire Cutters/Snips
    • Good for wires, good for skewers (scissors are a poor substitute and can be damaged by heavier materials), good for anything that needs more of a chop than scissors.
  • Pliers
    • You never know when you’ll need a better grip, to crimp wires, or to bend something stiff.
  • Dual-temp Hot Glue Gun
    • The dual-temp aspect is relevant. Low temp settings are good for a glob of hot glue that holds its shape when joining objects, the high temp settings are good for making stronger bonds, but also make the glue drippy.
  • Sharpies
    • Permanent markers that will draw and stay on anything always make the list. 
  • Toaster Oven
    • For shrink plastic
  • Power Drill and Bit Set
    • There isn’t much by way of power tools on this list, and it’s a more luxury item than most other things here, but I adore my power drills, and always have one within arm’s reach, in case I need to make a quick, clean hole in wood, plastic, or cardboard.


 This is hardly a full list, but it is good for starters.  Leave a note if you have suggestions that you’ve found useful!


As a footnote, there are a few things that I do not bring when working with kids, because of their propensity for suppressing creativity.

  • Stickers
    • Of the pre-made, fully-designed variety. Yes, they can be great fun. But when you’re creating, unless you need it for a specific purpose, like a logo, it can act as a stop button for one’s imagination.
  • Glitter, Glitter Glue, Sparkly Things
    • Sparkly things are like sugar.  Especially when working with kids, you give them something shiny, they will grab and consume it by the cupful, and it will overpower any other flavors they’ve put into their project.  Sugar is meant to be used in moderation.  If you want shinies, decide specifically where and why before pulling them out.

Upcycled Musical Instruments Workshop

Hey, folks!  Join Jen Fox and me for our Upcycled Musical Instruments Workshop this Saturday at 1450 Ocean! We’ll be bringing along some of our own inventions, including geometric string instruments, motorized pan pipes, and a spinning noisemaker. You can bring your own materials, maybe a big box for a string bass, or keys for a chimes mobile, or you can help me build a giant multi-material marimba from a recycled trellis. Whatever your inspiration, we will help you make it a reality.


Make sure to register! 


Upcycled Musical Instruments

Saturday, Sepember 20th, 1:00 – 2:30pm

1450 Ocean Ave. – Camera Obscura Santa Monica

Cost: $10

Register here!  Pre-registration guarantees you a spot and makes the musical muses happy.


String thing Pan pipes


Music, that universal medium! We’re lucky in that there are innumerable ways to create music using diverse, non-traditional materials. Let’s explore sound and basic design principles to build a personalized instrument from recycled materials – come away with a set of wind chimes, a children’s toy, and/or the confidence to teach others how to upcycle! 

Please bring 1-2 items traditionally considered “trash” out of which to build an instrument – we’ll also bring some starter materials. Things to consider when choosing your materials: most instruments need a hollow area to resonate from, chimes require suspension, many wind instruments use reeds, etc. Consider the components and design of existing instruments to help direct your materials search. Suggested materials: packaging, cardboard boxes (intact), glass bottles, jars, metal scraps or other metallic objects, paper/plastic/styrofoam cups and plates, string/yarn/twine/rope, straws, etc. We will facilitate the process, provide supplementary materials and examples of recycled instruments. Let’s tinker! Mostly we’ll be using hot glue guns, drills and other non-intimidating tools, and we’ll help you use anything you’re unfamiliar with.

Brush Bot Tinker Day at the Camera Obscura Building

Last Saturday, the fabulous Jen Fox and I had a Tinker Day at 1450 Ocean (the Camera Obscura building) in Santa Monica.  We used inexpensive and recycled materials to make brush bots.  Dollar store electric toothbrushes are a great source for materials, as they include a motor, battery, and other reusable bits.


Camera Obscura Building Setup


Check out a video of our fun!


Jen cut off the head from her toothbrush (and a couple others), and created a bristle bot built around a balloon and housing from a solar lawn light.  Balance was precarious at times, but when it fell, we discovered that it was good at breakdancing too.


Balloon Brush Bot


My brushbot was built on a spoon from Yogurtland, and stood on three golf tees.  I tried to keep it as minimal as possible otherwise – motor, battery, and wires.  For a switch, I stretched the wires out into arms and hooked them together when I wanted it to run.  And, of course, the bot requested eyes.  I couldn’t bring myself to refuse.


Brush BotBuilding the Brush Bot


We also created a couple bots made from bamboo skewers, one of which included a 3d printed mechanism to give the movement a little more wobble (see the video above).


As we decided to forgo pre-made battery packs and switches, there was a lot of experimentation of how to effectively hook up and control power to our bots.  We have used electrical tape to secure wires to a battery in the past; this time we tried using hot glue, metal pieces left over from the toothbrushes, coins, and balloons.  Keep an eye out for my upcoming Instructable detailing our different approaches.


Battery Connection