Barb Makes Things: Arduino Hair Wrap

Finally, an Arduino video and a wearables video, in one! I do both frequently enough. This project is a combination of the hair wraps I did all through my teenage years and the electronics I didn’t dive into until my 30s. I did make an effort in this direction a few years ago with conductive thread, but it just wasn’t reliable. Then I was introduced by a friend at Two Bit Circus to silicone-covered wire. *choir sings* Perfect.


The Arduino board is a nifty new little thing by Qtechknow called the Qduino mini. It has a built-in lipo battery charger, meter, and switch, which makes it ideal for this project as I wanted to mount everything to the hair clip and leave it be. I’d like to expand this project to have more strands, potentially rgb LEDs, and some sensors (light and accelerometer, perhaps), but for now, it works and I like it. See video below.


If you haven’t already, go on over to my YouTube channel, Barb Makes Things, and check out my other videos. This is number eleven!


Kinetic Show:LA

kineticshowLAkineticshowLAflyer


Mark and Wendy of CRASH Space and FlipBooKit have put together a truly unique exhibition called Kinetic Show: LA at ARENA 1 Gallery in Santa Monica, featuring a ton of tech and kinetic art. This is well worth checking out! What’s more, both of my Hexachords are on display to see, hear, and play. The Arduino-powered Hexachord has some shiny new code under the hood. Tonight is the opening, and it’ll be running through October 6th, so make sure you get out to see all of the fun!


hexachords-gallery

CRASHspace Signs

If you haven’t gathered, Crashspace is my hackerspace home, and the signs on the room doors were in dire need of update. (“Dante cleaned Shop One! Yay, Dante! Wait, which one is that?”) There were signs, but they were subtle printings on paper, which no one ever looked at.


So I made some new signs that are tool-specific to each room. Lasercut acrylic for Shop One, CNC router for Shop Two, and 3d printed for the Library. As I am wont to do, I made some tweaks in Illustrator of Peralta (one of my favorite fonts), and then translated it for the three different tools. Note: I did a little cleanup on the Shop Two sign, this picture shows it fresh off the router.


Now if you don’t know which room is which, you’ll be directed to the big, obvious, lovely signs on the doors.


https://farm8.staticflickr.com/7335/16199540699_938e5283df.jpg
CRASHspace Shop Two sign
CRASHspace Library sign


3D Modeling

Crashspace has been hosting a number of Instructables Build Nights lately, in which we’re sent a package of new tools or technologies to play with and use for making tutorials for the Instructables site. They get advertising and a greater project presence online, we get to host free events with the latest stuff. It’s fun.


3D Printed Spark.io DiffuserFor November, we did a Build Night using the new(ish) Spark.io technology, including Spark Cores and their not-currently-available Internet Buttons. The basic gist is that they’re wifi-enabled microcontrollers that hook up to their cloud and let you do “Internet of Things” projects. Think toaster that prints the weather forecast on your breakfast. As it’s a fairly new product, there are still glitches, so it was a bit of a slog to get them working. But that means that we’ve put together more detailed instructions for starting out.


I am systematically attacking all of the tools and media available at Crashspace, in my perennial quest for world domination generalist maker skills. For the last few months I’ve been buried largely in the 3d printers and 3d modeling software. For many reasons, I’ve focused largely on Autodesk’s 123D Design (and a bit of Blender), and most of the things I print are my own designs. I like the mix of virtual and physical, and I like spending time with my beloved calipers. 


In any case, I posted an instructable for a couple 3d printed diffusers I designed and printed for the Spark.io Build Night. They were a hit. The instructable shows how to make the model that I did, but the real aim is to show how to design a case/diffuser for a different device.


Another recent project is creation of a hybrid car badge for the limited release Rav4 Toyota/Tesla collaboration. The modeling stage is done, it’s been printed, acetone vapor bathed, and made smooth with a sandable primer, and I’m currently in the middle of an education on molding and chrome plating. 


Soon, I’ll be posting a new tutorial for a Chibitronics Papercut Bookmark that I made for my dad for Christmas.

Koi/Whale 3D-Print Model

3D Printed Big Fish


I’ve spent a lot of time lately in Autodesk’s 123D Series. This is something I modeled in 123D Design the other day.  It was originally intended to be a koi fish, but it looks a bit like a whale.  Oh well, I still like it.  Download, print, and enjoy.


This critter was printed on a Bukobot at Crashspace, using gold PLA.


You can find it at thingiverse.

Brush Bot Tinker Day at the Camera Obscura Building

Last Saturday, the fabulous Jen Fox and I had a Tinker Day at 1450 Ocean (the Camera Obscura building) in Santa Monica.  We used inexpensive and recycled materials to make brush bots.  Dollar store electric toothbrushes are a great source for materials, as they include a motor, battery, and other reusable bits.


Camera Obscura Building Setup


Check out a video of our fun!


Jen cut off the head from her toothbrush (and a couple others), and created a bristle bot built around a balloon and housing from a solar lawn light.  Balance was precarious at times, but when it fell, we discovered that it was good at breakdancing too.


Balloon Brush Bot


My brushbot was built on a spoon from Yogurtland, and stood on three golf tees.  I tried to keep it as minimal as possible otherwise – motor, battery, and wires.  For a switch, I stretched the wires out into arms and hooked them together when I wanted it to run.  And, of course, the bot requested eyes.  I couldn’t bring myself to refuse.


Brush BotBuilding the Brush Bot


We also created a couple bots made from bamboo skewers, one of which included a 3d printed mechanism to give the movement a little more wobble (see the video above).


As we decided to forgo pre-made battery packs and switches, there was a lot of experimentation of how to effectively hook up and control power to our bots.  We have used electrical tape to secure wires to a battery in the past; this time we tried using hot glue, metal pieces left over from the toothbrushes, coins, and balloons.  Keep an eye out for my upcoming Instructable detailing our different approaches.


Battery Connection

Latest: Hair Stick, Sofa Foot Box, and 3D Printed Monster

Lots of making recently.  My Dremel tinkering continues, in the form of a two-pronged hair stick (which works pretty well, and doesn’t pull on my hair as much as a regular hair tie), and a wooden box made from the repurposed foot of a sofa.


The hair stick was a straightforward process, a matter of drawing the desired shape on the top, and on the side, and then using the dremel tools (and scroll saw to start with) to carve it down to the desired shape.  I used some wenge wood, which is nicely solid (less likely to snap) and pretty.  It also smells really nice, incidentally, but I plan to lacquer the thing.  You’ll see in the sofa foot box, I got into a bit of marquetry, and am considering doing a little decoration on the wide end of this hair stick.  The color of it disappears a bit in my dark blond hair; putting a finish on and adding some patterned details should help.


Hair pin cut Hairpin w flowers Hairpin side Hairpin in hair


The full process of making my Repurposed Sofa Foot Box (with Bonus Marquetry) can be found on Instructables.  It’s pretty fun, and a good project for getting accustomed to the dremel Multi-Max.  It’s mostly made from used parts, except for the hinges.  Had I time, I would have made wooden hinges for it, from that same lovely wenge.  Wooden hinges and associated Instructable, future project.


Box fin back side Box fin redback


3D printing is something I haven’t done much since last year at the Exploratory on the Replicator 2.  Lately, I’ve been playing with 123D Design (lots of other software options out there to explore too), and recently put together this little monster based on a papercut I did a while back on hitRECord.  It’s largely an extrusion of a 2D image (exported from Illustrator to .svg and imported to 123D Design – in case you were wondering how to do that), with some adjustments to the edges, and holes for articulated arms.  There’s a bit of an overhang issue at those cut out spots, but it’s small enough and loose enough as to not cause a major problem.  I’ll probably come up with a different solution for the next version, especially as it’d be nice to have the limbs extend further into the body, which will require larger holes.  I attached the limbs with wire, curled at either end.  Another option would be to use a piece of filament and melt it at either end to hold the joints in place.  I shall experiment and let you know.


Monster printing Monster on bed monster on tiptoe


Instructables bot

Next on my plate is designing a 3d printed bot with a crank and various other mechanisms. I might make it look like the Instructables robot, cuz that thing is cute and looks like it should be moving.

Tech Disrupting

Cause & Effect Machine Flyer


Thanks to the wonderful folks at MakerEd, I got to be involved with the Intel Experience Popup Store this holiday season.  I was one of three “Tech Disruptors” at the Venice store (think Makers-in-Residence), who took apart old electronics and built new inventions from the parts.  We came up with some fun gadgets on our own and in collaboration with people who came into the store, especially kids.  There’s a special joy when children who have never seen the inside of a computer or car stereo crack into one for the first time, and it’s great to witness shy kids come out of their shells.  It’s so hammered into us that you Do Not mess with technology, you Do Not void the warranty, that breaking the taboo is wildly freeing.  Even the most rule-abiding is willing to join in when exclaim gleefully, “I want to see what’s inside, so I’m going to take this printer down to nothing.  Want to help?”  We’re curious by nature, it’s how we learn,  so why on earth should we keep kids from it?

One great thing from this experience was getting to know my fellow Tech Disruptors Carlyn Maw and Jen Fox.  The store’s run has ended, but we’re just getting started working together.  (Last Friday I introduced Jen to the fun that is shrink plastic, and she did little else the rest of the night.)

In any case, here are some of the things we came up with:

IMG_0213

 – Circuit Board Christmas Tree. Made from some of the many circuit boards we had on hand.  The dremel and I became very close during this process, we’re now BFFs.  It’s created from six half tree shapes, strung together with some old wires.  The colorful component ornaments were largely the work of guests and other employees at the Intel store, who all got very involved with our projects.  As a final touch, I charlieplexed some LEDs and plugged the whole thing into an Arduino.  A proximity sensor made the lights blink more quickly when you got up close.  I’m pretty proud of our result.


IMG_0338

 – Hard Drive Bird.  It occurred to me that the actuator arm of a hard drive looks a bit like a bird’s head, so I carved up some wings/feathers from multiple colored circuit boards, and added a wire foot and peacock feather that I had lying around.  I swapped out the hard drive’s motor for a different stepper motor, and rigged up a belt made from gaff tape that transfers Arduino commands from the stepper to make the bird’s head twitch.  See the video!


the noisemaker, mounted

 – Gear Noisemaker.  This is something that evolved over the course of my time there (and is still evolving in a current project, which I’ll get into in another post).  It started out simple – a VCR motor and a cardboard gear, but quickly accumulated colorful electronic components for the gear’s face, and a plastic knife that would spin and hit whatever items we surrounded the gear with.  Among the noise items: parts from a 3.5″ floppy disk, a broken cd, random metal machine bits, copper wire strings, and old wind chimes.  By the end, I’d mounted the whole thing to a PVC frame, some guests added more strikers to the gear, and we incorporated it into the big Cause & Effect Machine.


cause & effect dog dish filler

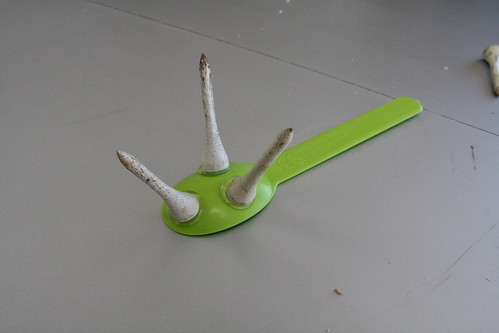
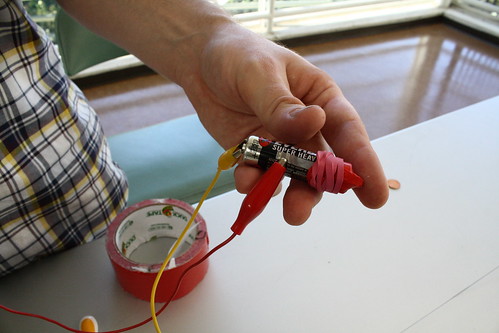
- Cause & Effect Machines.  Each of the Tech Disruptors was challenged to come up with and put on an event.  Rube Goldberg machines are so much fun, I thought it would be an interesting challenge to try to create one.  I built a seven-foot PVC pipe frame for us to build on and went nuts at dollar stores, and off we went.  The first day doing this project saw the creation of a dog waterer, and when we brought the activity out for our final showcase, Jen and I made a chain reaction that used a wooden skewer marble run, a lever triggered by jenga blocks, and two big metal enclosures attached to alligator cords that closed a circuit and started my noisemaker running.  Watch the videos!


Check out the full photo set on my flickr.  Carlyn made very detailed posts from her time at the store, and she has a lot on her flickr stream as well.