Woodcraft and Tinkering School Teaser

 I’ve been spending a lot of time in the workshop lately, creating more of my wooden ragbots and wooden jewelry for my upcoming Etsy shop. 


IMG 6767new wooden ragbotlayered ring


We’ve been quite busy with the launch of reDiscover Center’s new Tinkering Club program – tinkering every day of the week!  Expect a recap of summer Tinkering School at reDiscover Center soon, with oh so many pictures. To whet your appetite, here’s a video from one of the light and shadow plays a group of campers created (they wrote it, made the stage/screen, designed all of the puppets, and did the lighting).


Kinetic Show:LA

kineticshowLAkineticshowLAflyer


Mark and Wendy of CRASH Space and FlipBooKit have put together a truly unique exhibition called Kinetic Show: LA at ARENA 1 Gallery in Santa Monica, featuring a ton of tech and kinetic art. This is well worth checking out! What’s more, both of my Hexachords are on display to see, hear, and play. The Arduino-powered Hexachord has some shiny new code under the hood. Tonight is the opening, and it’ll be running through October 6th, so make sure you get out to see all of the fun!


hexachords-gallery

CRASHspace Signs

If you haven’t gathered, Crashspace is my hackerspace home, and the signs on the room doors were in dire need of update. (“Dante cleaned Shop One! Yay, Dante! Wait, which one is that?”) There were signs, but they were subtle printings on paper, which no one ever looked at.


So I made some new signs that are tool-specific to each room. Lasercut acrylic for Shop One, CNC router for Shop Two, and 3d printed for the Library. As I am wont to do, I made some tweaks in Illustrator of Peralta (one of my favorite fonts), and then translated it for the three different tools. Note: I did a little cleanup on the Shop Two sign, this picture shows it fresh off the router.


Now if you don’t know which room is which, you’ll be directed to the big, obvious, lovely signs on the doors.


https://farm8.staticflickr.com/7335/16199540699_938e5283df.jpg
CRASHspace Shop Two sign
CRASHspace Library sign


Bobble Head Bot Papertoy

Thanks to everyone who came out and made papertoys with me at our LA Makerspace booth at Kickstarter LA Film Fest last night!


Bobblehead BotsBobblehead Bots


If you didn’t get to join us, you can still make one! Just print the pattern, cut on the solid lines, fold on the dotted lines, and follow the instruction photos below, using glue or tape to attach the tabs. Then decorate and make it your own!


bobble-bot bobblebot assemble 1 bobblebot assemble 2
bobblebot assemble 3 bobblebot assemble 4 bobblebot assemble 5

Brush Bot Tinker Day at the Camera Obscura Building

Last Saturday, the fabulous Jen Fox and I had a Tinker Day at 1450 Ocean (the Camera Obscura building) in Santa Monica.  We used inexpensive and recycled materials to make brush bots.  Dollar store electric toothbrushes are a great source for materials, as they include a motor, battery, and other reusable bits.


Camera Obscura Building Setup


Check out a video of our fun!


Jen cut off the head from her toothbrush (and a couple others), and created a bristle bot built around a balloon and housing from a solar lawn light.  Balance was precarious at times, but when it fell, we discovered that it was good at breakdancing too.


Balloon Brush Bot


My brushbot was built on a spoon from Yogurtland, and stood on three golf tees.  I tried to keep it as minimal as possible otherwise – motor, battery, and wires.  For a switch, I stretched the wires out into arms and hooked them together when I wanted it to run.  And, of course, the bot requested eyes.  I couldn’t bring myself to refuse.


Brush BotBuilding the Brush Bot


We also created a couple bots made from bamboo skewers, one of which included a 3d printed mechanism to give the movement a little more wobble (see the video above).


As we decided to forgo pre-made battery packs and switches, there was a lot of experimentation of how to effectively hook up and control power to our bots.  We have used electrical tape to secure wires to a battery in the past; this time we tried using hot glue, metal pieces left over from the toothbrushes, coins, and balloons.  Keep an eye out for my upcoming Instructable detailing our different approaches.


Battery Connection

Latest: Hair Stick, Sofa Foot Box, and 3D Printed Monster

Lots of making recently.  My Dremel tinkering continues, in the form of a two-pronged hair stick (which works pretty well, and doesn’t pull on my hair as much as a regular hair tie), and a wooden box made from the repurposed foot of a sofa.


The hair stick was a straightforward process, a matter of drawing the desired shape on the top, and on the side, and then using the dremel tools (and scroll saw to start with) to carve it down to the desired shape.  I used some wenge wood, which is nicely solid (less likely to snap) and pretty.  It also smells really nice, incidentally, but I plan to lacquer the thing.  You’ll see in the sofa foot box, I got into a bit of marquetry, and am considering doing a little decoration on the wide end of this hair stick.  The color of it disappears a bit in my dark blond hair; putting a finish on and adding some patterned details should help.


Hair pin cut Hairpin w flowers Hairpin side Hairpin in hair


The full process of making my Repurposed Sofa Foot Box (with Bonus Marquetry) can be found on Instructables.  It’s pretty fun, and a good project for getting accustomed to the dremel Multi-Max.  It’s mostly made from used parts, except for the hinges.  Had I time, I would have made wooden hinges for it, from that same lovely wenge.  Wooden hinges and associated Instructable, future project.


Box fin back side Box fin redback


3D printing is something I haven’t done much since last year at the Exploratory on the Replicator 2.  Lately, I’ve been playing with 123D Design (lots of other software options out there to explore too), and recently put together this little monster based on a papercut I did a while back on hitRECord.  It’s largely an extrusion of a 2D image (exported from Illustrator to .svg and imported to 123D Design – in case you were wondering how to do that), with some adjustments to the edges, and holes for articulated arms.  There’s a bit of an overhang issue at those cut out spots, but it’s small enough and loose enough as to not cause a major problem.  I’ll probably come up with a different solution for the next version, especially as it’d be nice to have the limbs extend further into the body, which will require larger holes.  I attached the limbs with wire, curled at either end.  Another option would be to use a piece of filament and melt it at either end to hold the joints in place.  I shall experiment and let you know.


Monster printing Monster on bed monster on tiptoe


Instructables bot

Next on my plate is designing a 3d printed bot with a crank and various other mechanisms. I might make it look like the Instructables robot, cuz that thing is cute and looks like it should be moving.

The Hexachord – Part 3

The Hexachord, Part 1

The Hexachord, Part 2Hexachord full


Hard deadlines are good in many ways.  I’ve been involved enough with this project to spend all my “free time” on it, but when I set the deadline to have a working version done by Maker Faire, it really lit a fire under me.  Regular Crashspace meetings to show my progress kept me accountable, lots of checklists kept me on task, and limited time available to use the woodworking tools made me organize very efficiently.  


It is endlessly frustrating to find that you have a couple hours free at home and the tool you need is at the hacker space and unavailable.  So I scheduled my home work time as prep for working at Crashspace.  Need to cut something at the space?  Spend time at home calculating, measuring, and marking so that you can jump right into it when you get those couple hours at the band saw.  Want to use the drill press?  Leave it for the end of your time at the space, so if you need to leave early, you can still use a hand drill at home.  Cut all necessary pieces for the hinges quickly, and then assemble them later.  


And make sure to set aside a little time to socialize.


I designed my Hexachord to have removable parts.  The hinges are bolted on, so a sound chamber can be easily replaced or removed for transport.  The face with the motor and pick arm is held securely with removable pegs, so that I can change the face to one that has multiple pick arms for playing more than one sound chamber at once.


Stained sound chambers Face close pegs Face back


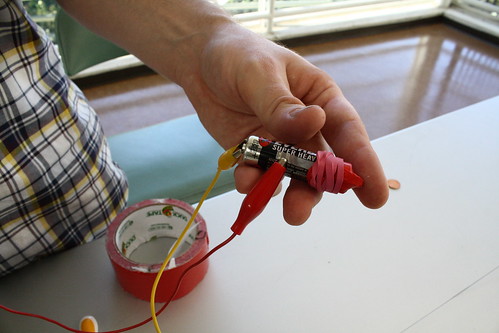
The motor was salvaged from a video cassette rewinder.  It came with a convenient belt and wheel, to which I attached the plectrum arm base – a hand-cut wooden gear I’d made a couple months before and was dying to use.  My original thought was to drill into the gear at an angle and secure the arm into that, but it wound up being more feasible to build a structure from bamboo sticks that would support the position of the arm.  For one thing, it was easier to adjust, and for another, I just plain like building with bamboo skewers.


The knobs were stained to match their associated sound chambers, and all were placed on the same side so that the Hexachord could be played by one person standing in the same place.  Each converted their rotary motion to the yoke mechanisms placed behind each sound chamber.


Knobs Mechanism
Mechanism in Mechanism out


I unveiled the completed Hexachord at Maker Faire as planned, it was well-received, and I got to drive home with the lovely view of an Editor’s Choice ribbon hanging from my rear view mirror.


Finishing touches Me and the Hexachord Editor's Choice


Here are the promised videos: one of my interview at Maker Faire, and one of the finished Hexachord in a quieter environment!


Flickering Origami Lantern Instructable

25 chinese lanterns... finished!

A few years ago, a friend wanted some origami lanterns for the centerpieces at her wedding reception, so I made some.  I was pretty pleased with how they turned out and they looked nice with the bamboo.

About a year ago, I revisited the design and came up with an addition: LIGHT!  (lanterns with light. Revolutionary, I know)  Finally it came time to create an instructable for the project, and here it is.  It even got featured!  Woohoo!

I’ve entered it in the Instructables Papercraft Contest, so make sure to go vote for it (assuming you like it, of course.  no obligation if you hate it or are lazy).  The deadline for voting is Thursday (March 27th) at midnight.

Oh, and if you make one, please let me know!  I’d love to see pictures of the variations people come up with.

Distortion in Wonderland

There’s a reason that Alice in Wonderland art and retellings are so prevalent, and it’s not just because it’s in the public domain.  The sheer ridiculousness of Wonderland is refreshing – given that we as adults have near endless regulations.  Wonderland defies gravity, logic, social custom, and turns it all on its head.


Some of my favorite artists play with perspective and distortion, in particular Justin Bua and David Garibaldi, and a big part of my love of Wonderland is that it practically begs to be twisted into new reincarnations.


In the Alice paper collage I’m working on at the moment, I’m taking advantage of that: the entire project is one of the largest I’ve done, and it has a great amount of detail, such as a puffy armchair less than an inch tall.  Alice stuck inside the White Rabbit’s house is far from a unique choice, but it’s an apt place to start when it comes to stretching regular proportions.


The tiniest armchair

tiny wonderlanders

My Alice is not a child, and she wears badass boots.

Alice boots